

FCM doesn’t support VoIP pushes; use APNs + PushKit for VoIP calls.
iOS UI Kit Sample App
Reference implementation of iOS UIKit, FCM and Push Notification Setup.
What this guide covers
- CometChat dashboard setup (enable push, add FCM iOS + APNs providers) with screenshots.
- Firebase/FCM + CometChat provider wiring (credentials, Podfile, capabilities).
- Token registration/rotation with CometChat Push Notifications (FCM iOS provider).
- Incoming message/call handling and deep links.
- Payload customization and testing.
How FCM + CometChat work together
- FCM’s role: Firebase issues the iOS FCM registration token and delivers the push payload. On iOS, FCM hands off to APNs using the APNs key/cert you upload in Firebase.
- CometChat Notifications’ role: The FCM iOS provider you create in the CometChat dashboard holds your Firebase service account. When you call
CometChatNotifications.registerPushToken(..., .FCM_IOS, providerId), CometChat binds that FCM token to the logged-in user and sends pushes to FCM on your behalf. - Flow (same bridge used in
android-push-notifications.mdx): Request permission → register for remote notifications → FCM returns the registration token → afterCometChat.loginsucceeds, register that token withCometChatNotificationsusing the FCM provider ID → CometChat sends payloads to FCM → FCM hands to APNs →UNUserNotificationCenterDelegatesurfaces the notification/tap.
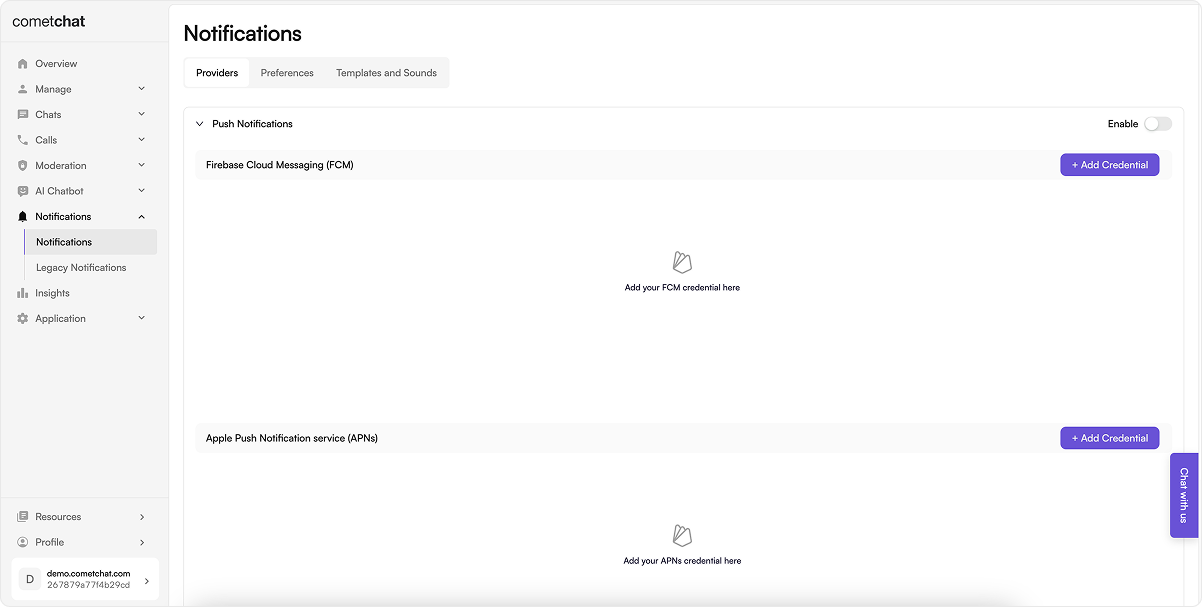
1. Enable push and add providers (CometChat Dashboard)
- Go to Notifications → Settings and enable Push Notifications.
- On Firebase:
- Go to Project Settings → Service accounts and generate a new private key; download the JSON file.

- On CometChat Dashboard:
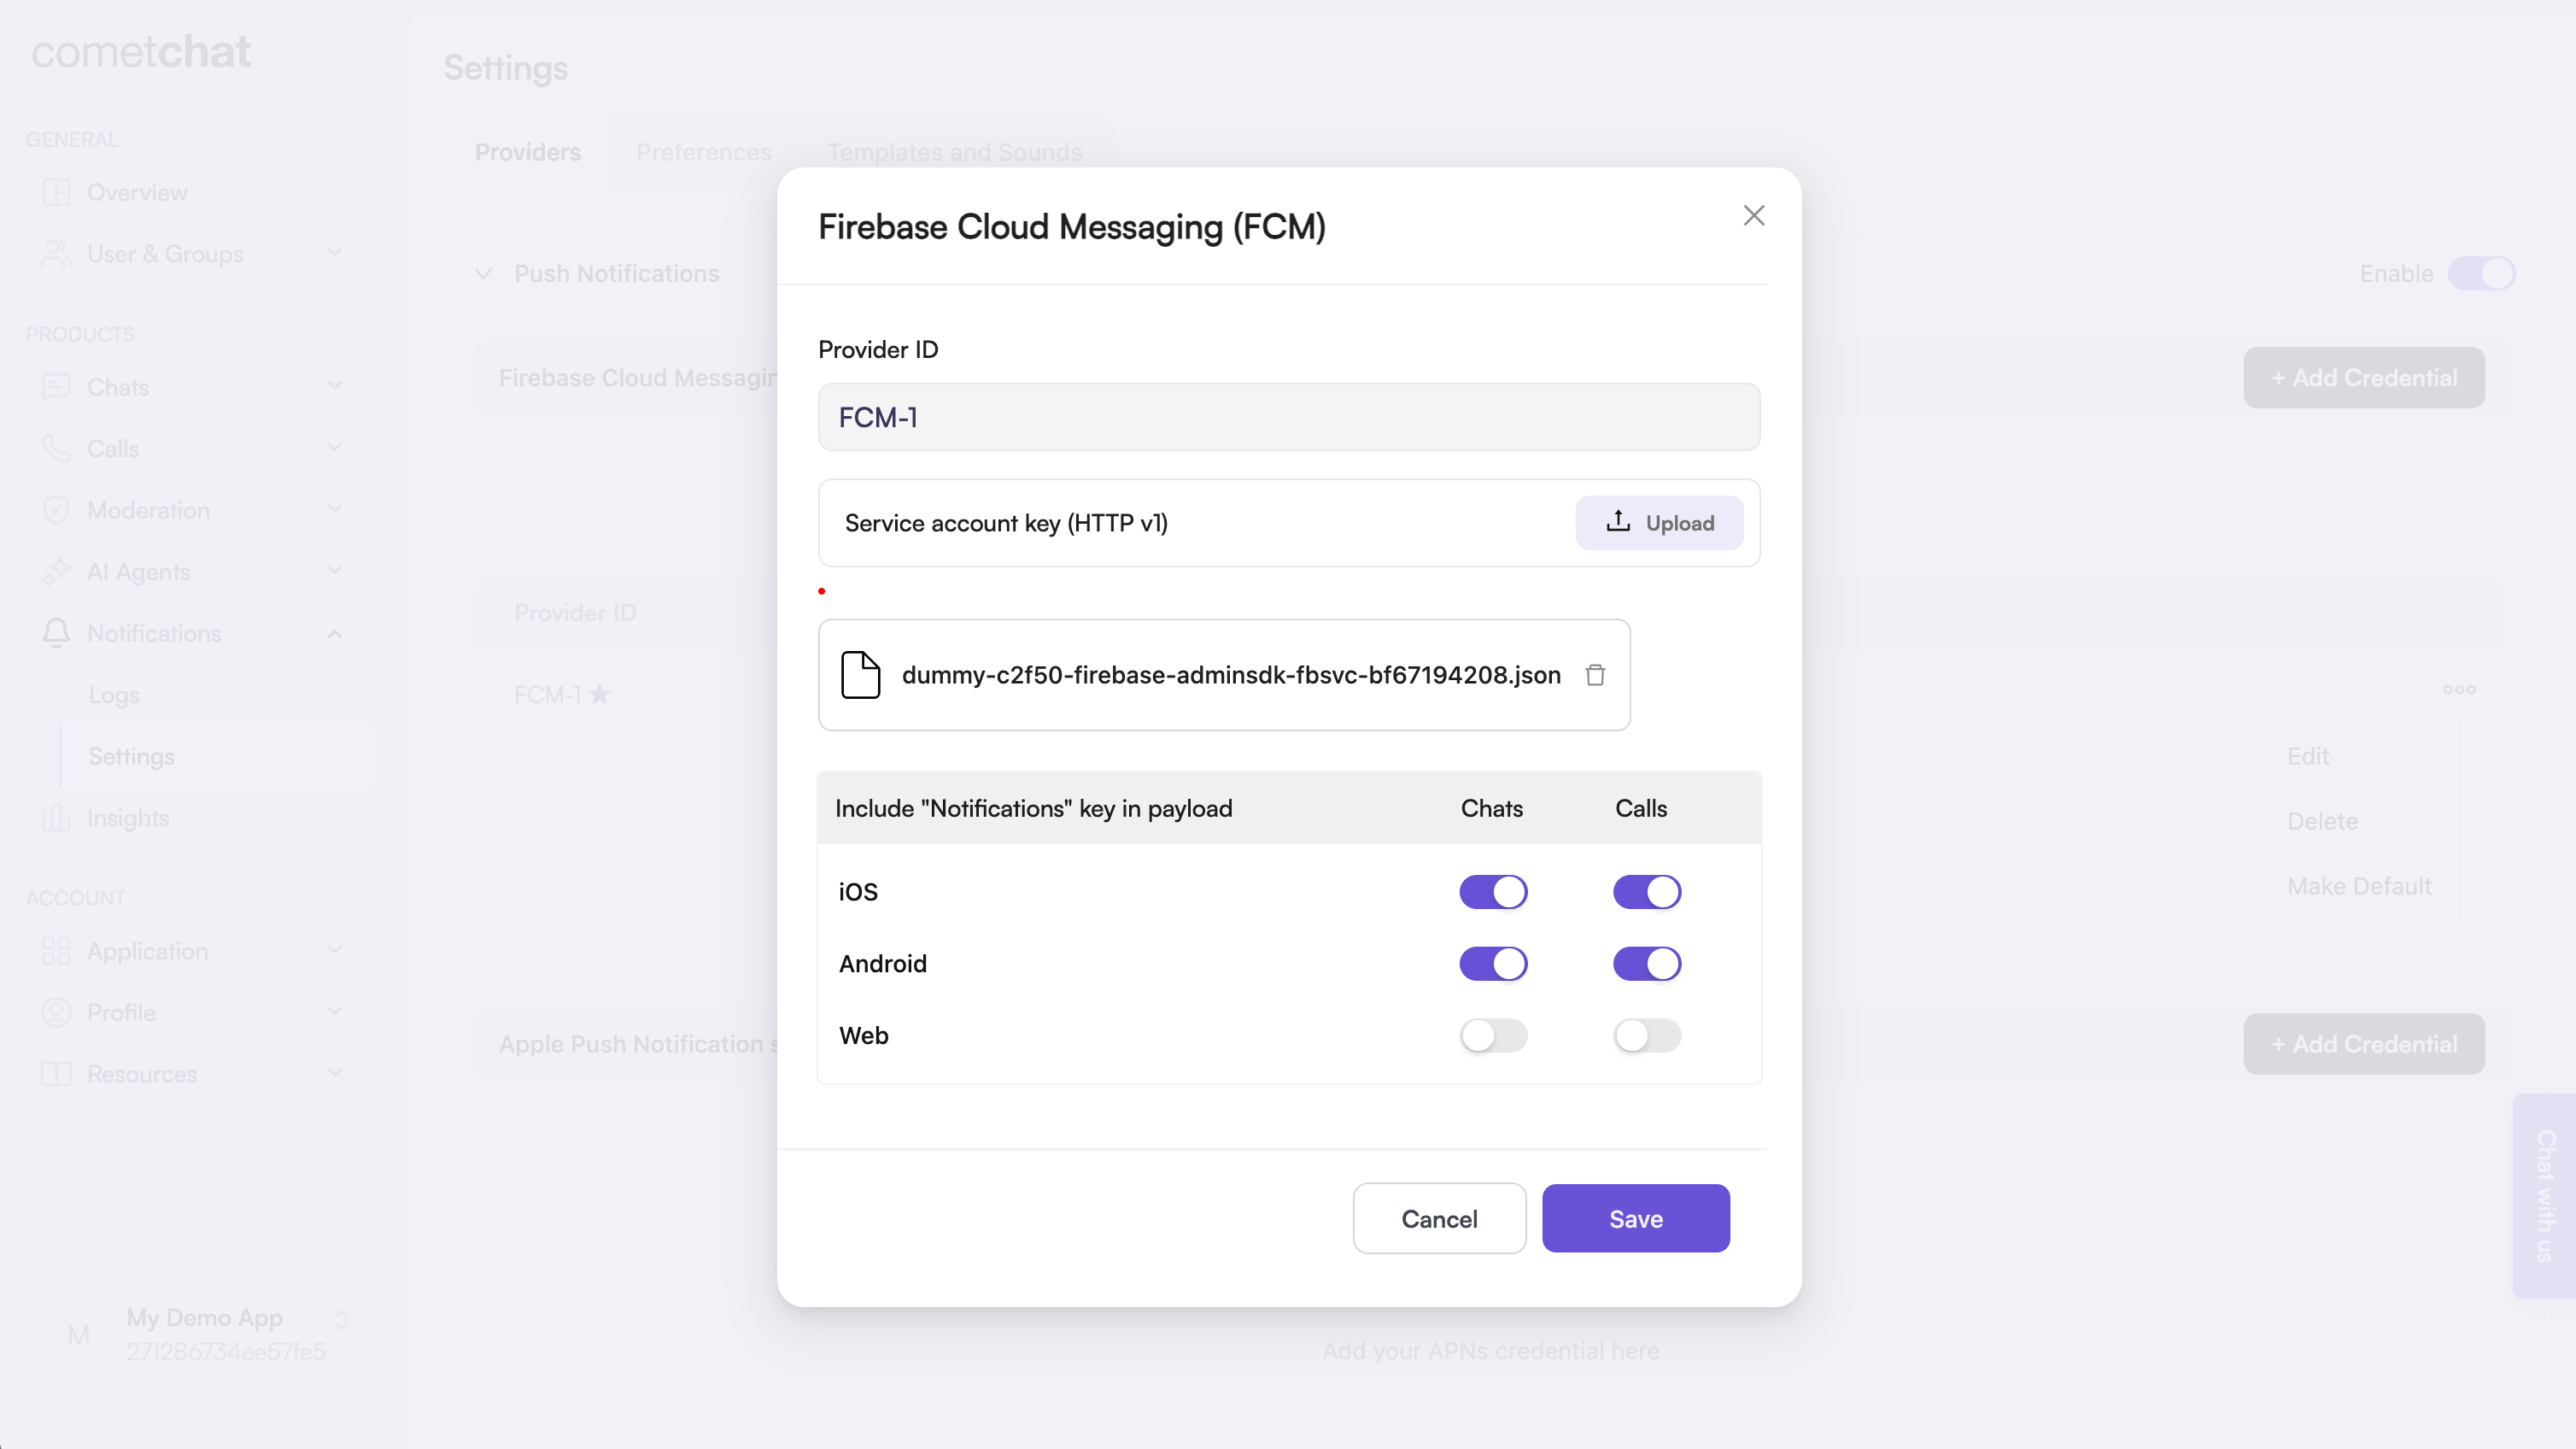
- Add an FCM iOS provider and upload your Firebase service account JSON; copy the Provider ID.
2. Upload your APNs Certificates
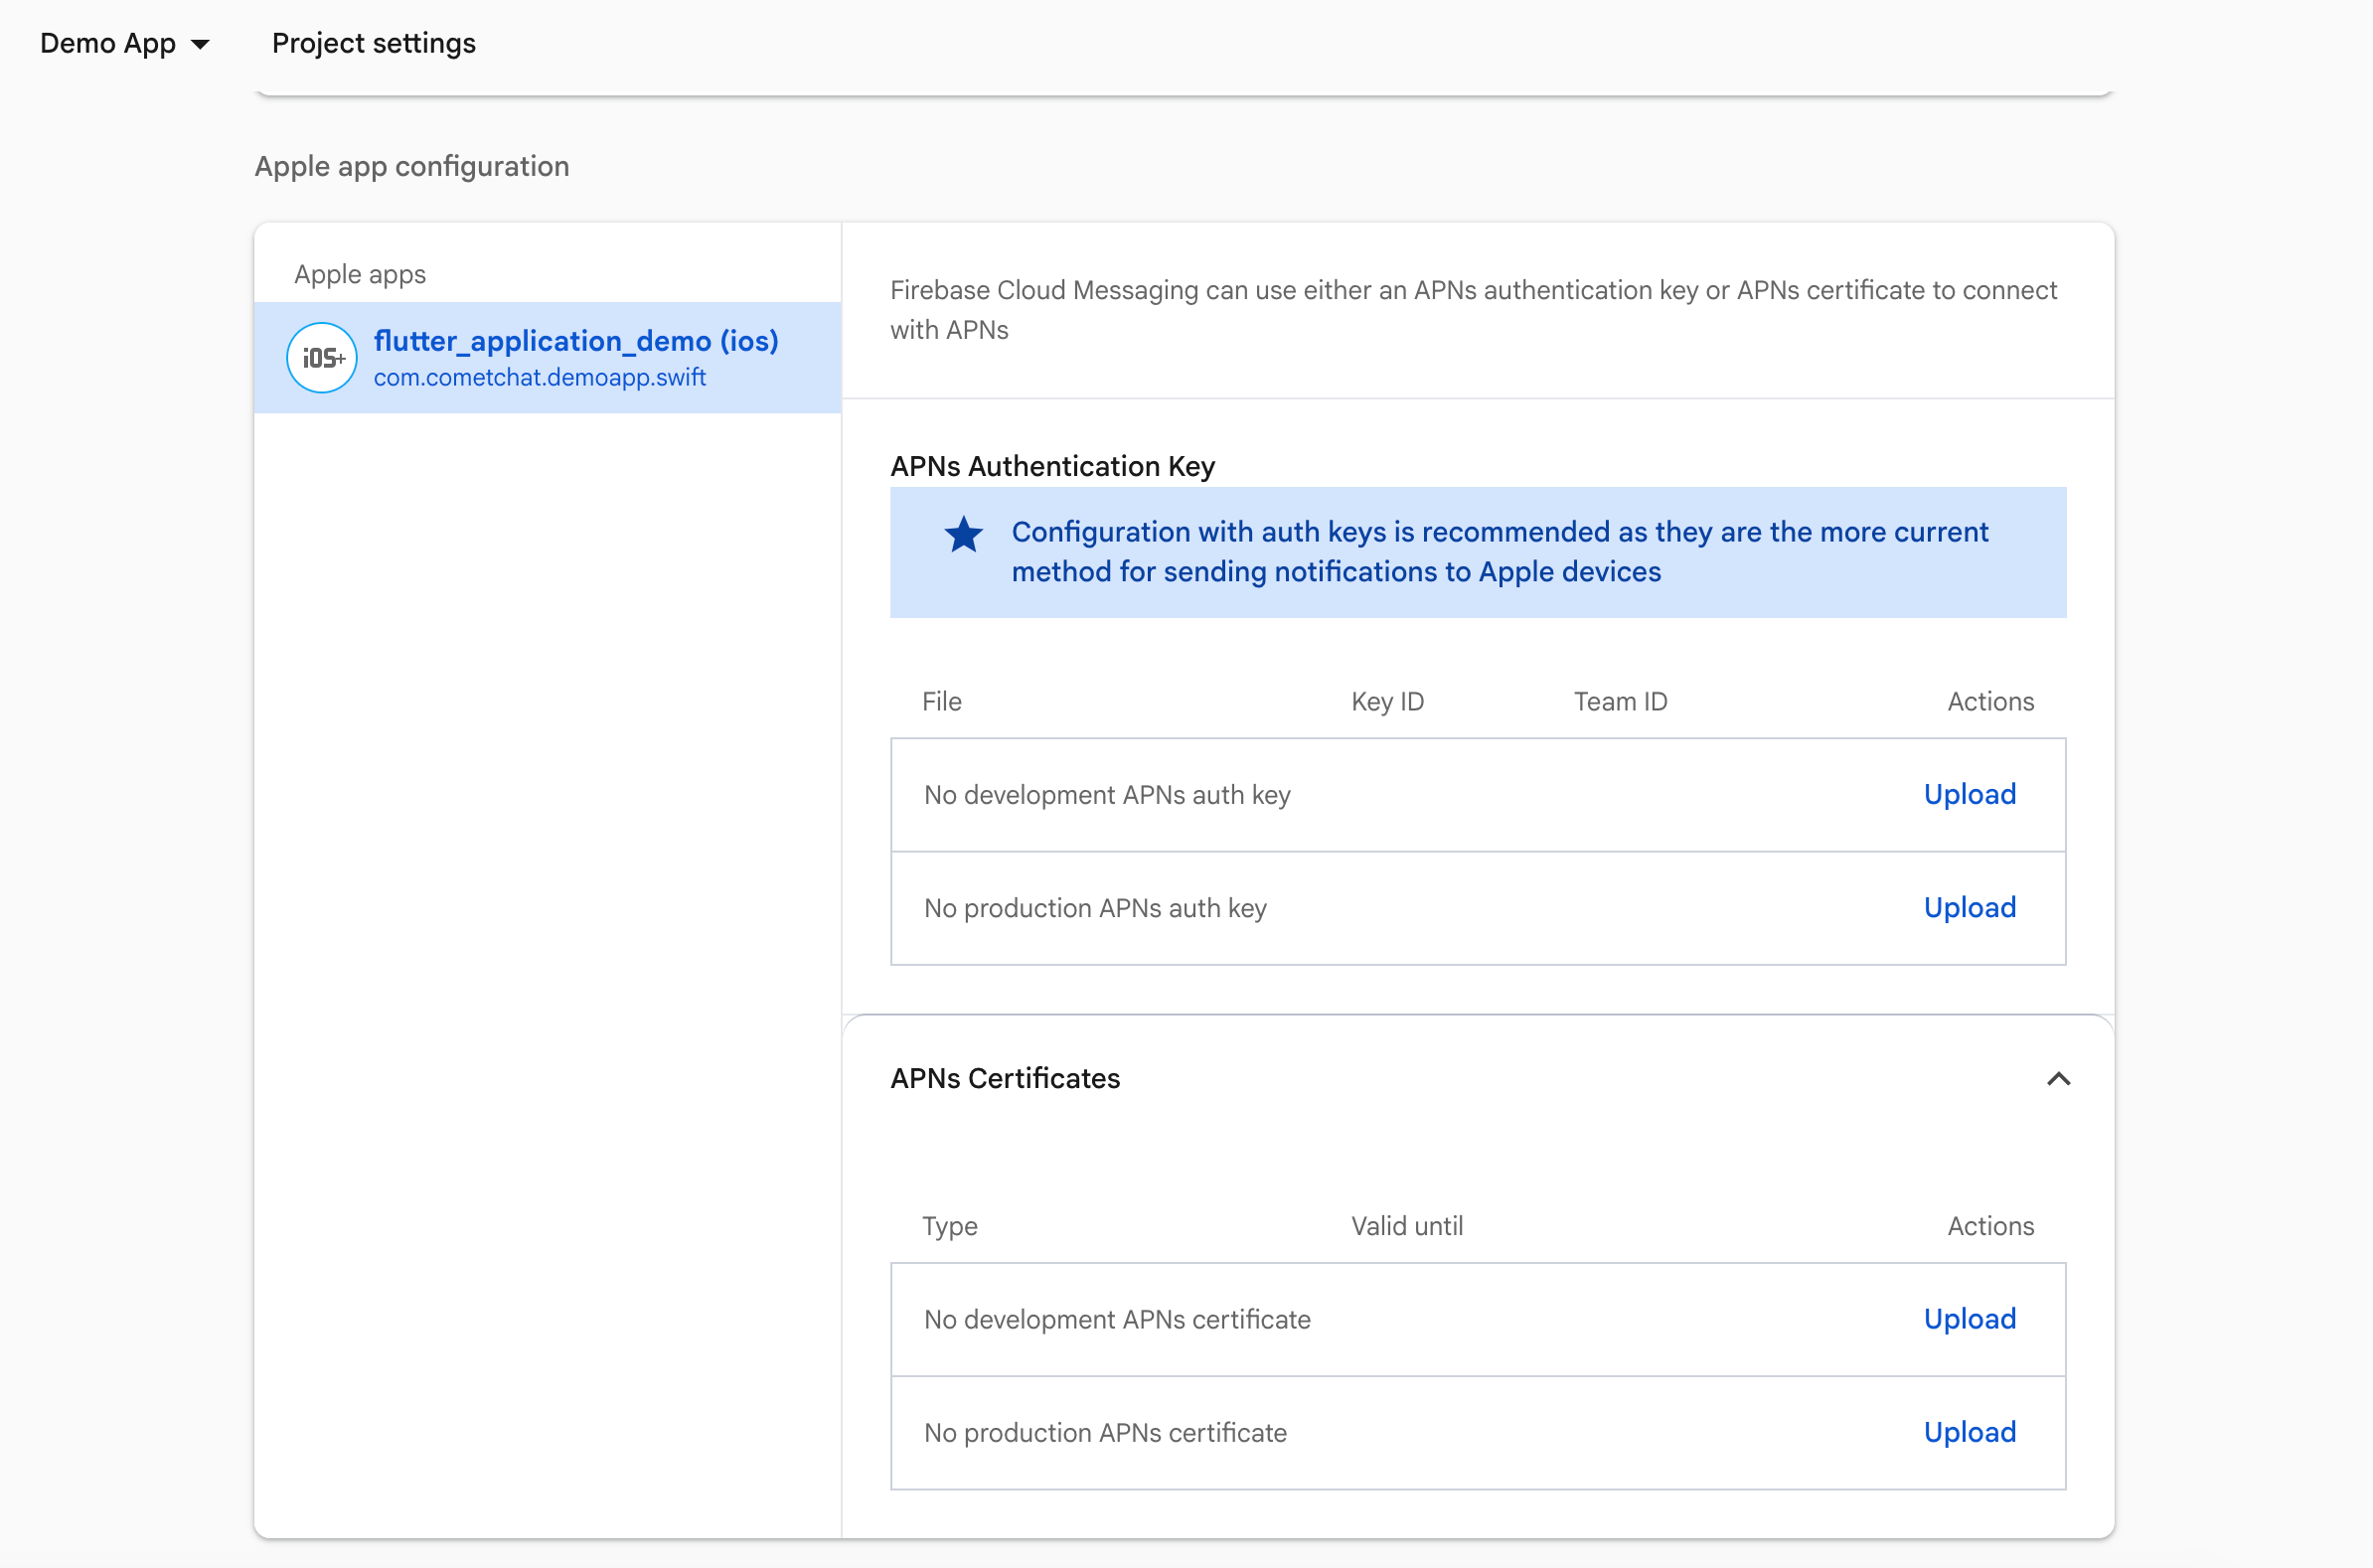
- In the Firebase Console, go to Project Settings → Cloud Messaging.
- Under iOS app configuration, upload your APNs authentication key or certificates.
3. Prepare Firebase and CometChat
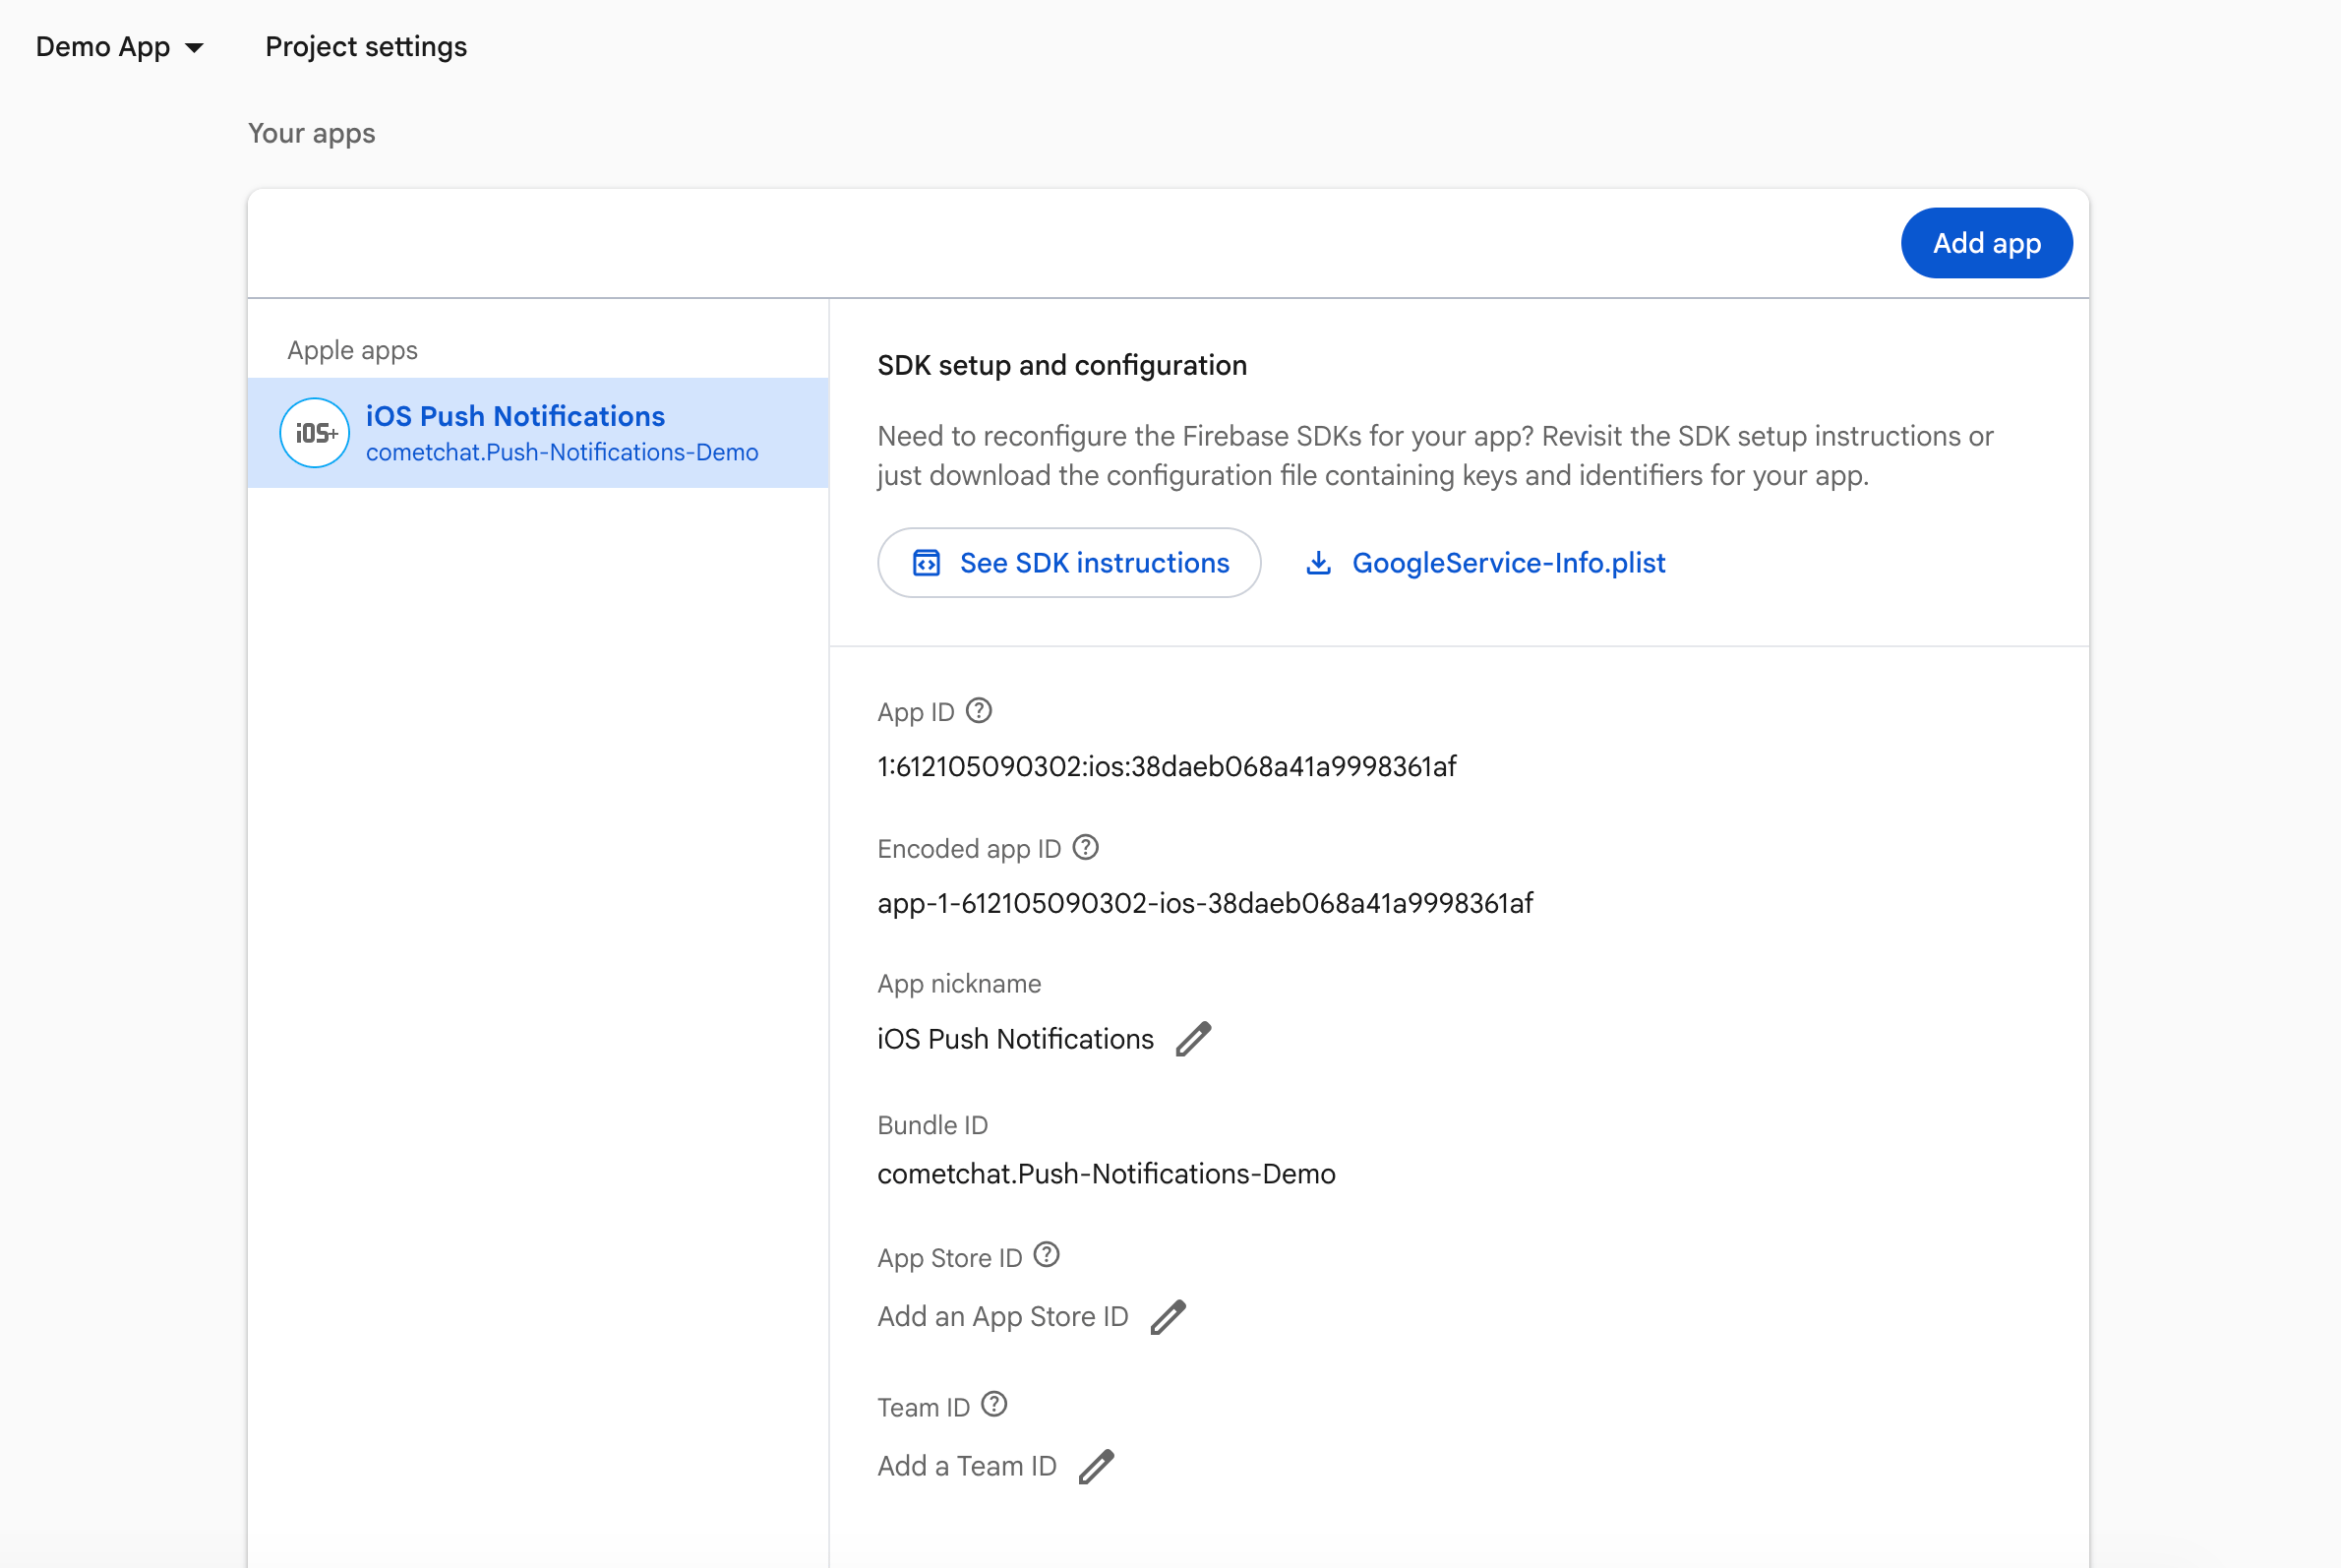
- Firebase Console: download and add
GoogleService-Info.plistto your target.
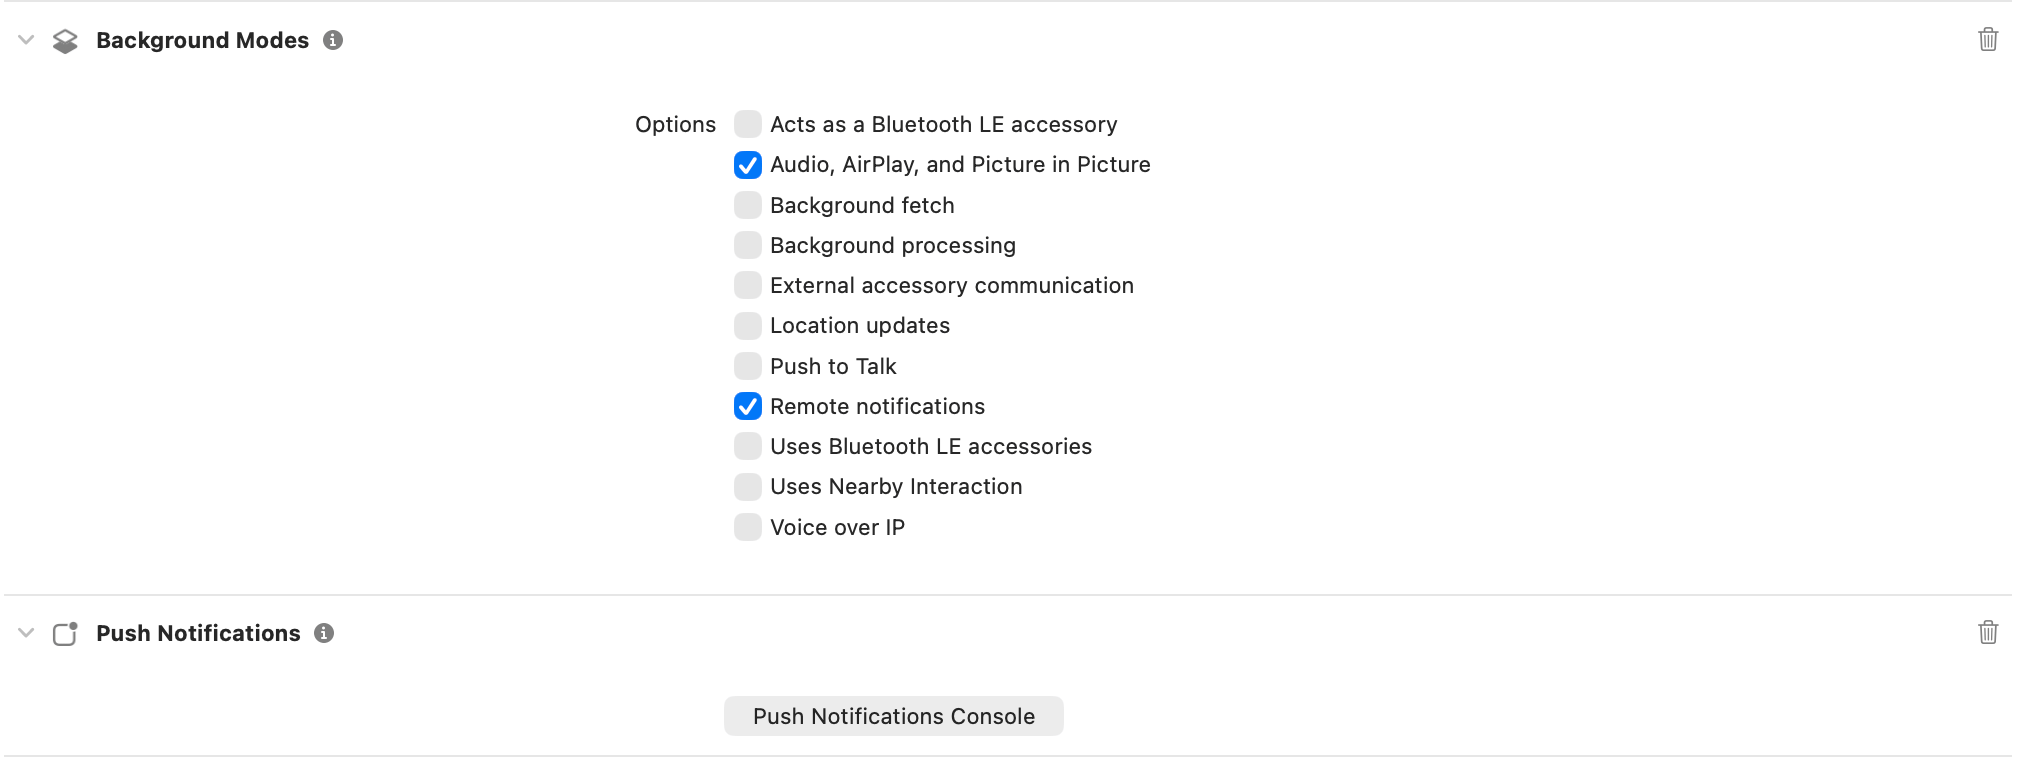
- Xcode capabilities: Push Notifications, Background Modes → Remote notifications.
4. Add dependencies (Podfile)
pod install.
5. Wire AppDelegate (Firebase + delegates)
- Initializes Firebase, sets
MessagingDelegateandUNUserNotificationCenterDelegate, asks for alert/badge/sound permission, and registers for remote notifications. - Sets
Messaging.messaging().apnsTokenso FCM can map the APNs token and later deliver via APNs. - Stores the FCM registration token and calls
registerStoredPushToken()so CometChat can bind the token to your logged-in user (using the Provider ID you configured). - Leaves
willPresentto show banners/sounds in foreground instead of silently ignoring the notification.
6. Create FCM helper
CreateCometChatFCMHelper.swift and add:
- Wraps permission prompts + delegate wiring so you can call one method from
AppDelegate. - Sets the notification delegate early and registers for APNs on the main queue (Apple requirement).
- Keeps all push setup in a reusable singleton to call from tests, scenes, or multi-target setups.
7. Testing checklist
FirebaseApp.configure()runs; FCM token logs after login; registration with CometChat succeeds.- Message from another user:
- Foreground:
willPresentbehavior as expected. - Background/terminated: tap opens the correct chat.
- Foreground:
- Rotate the FCM token (
didReceiveRegistrationToken) and confirm re-registration. - VoIP: VoIP token registers; incoming call shows CallKit; Accept/Decline controls the CometChat call.