

React Native UI Kit Sample App
Reference implementation of React Native UI Kit, FCM and Push Notification Setup.
What this guide covers
- CometChat Dashboard setup (enable push, add FCM providers).
- Platform credentials (Firebase).
- Copying the sample notification stack and aligning IDs/provider IDs.
- Native glue for Android (manifest permissions).
- VoIP call alerts with FCM data-only pushes + CallKeep native dialer.
- Token registration, navigation from pushes, testing, and troubleshooting.
What you need first
- CometChat app credentials (App ID, Region, Auth Key) and Push Notifications enabled with an FCM provider (React Native Android).
- Firebase project with an Android app (
google-services.jsoninandroid/app) and Cloud Messaging enabled. - React Native 0.81+, Node 18+, physical Android devices for reliable push/call testing.
How FCM + CometChat work together
- FCM (Android) is the transport: Firebase issues the Android FCM token and delivers payloads to devices.
- CometChat provider holds your credentials: The FCM provider you add (for React Native Android) stores your Firebase service account JSON.
- Registration flow: Request permission → Android returns the FCM token → after
CometChat.login, register withCometChatNotifications.registerPushToken(token, platform, providerId)usingFCM_REACT_NATIVE_ANDROID→ CometChat sends pushes to FCM on your behalf → the app handles taps/foreground events via Notifee.
1. Enable push and add providers (CometChat Dashboard)
- Go to Notifications → Settings and enable Push Notifications.
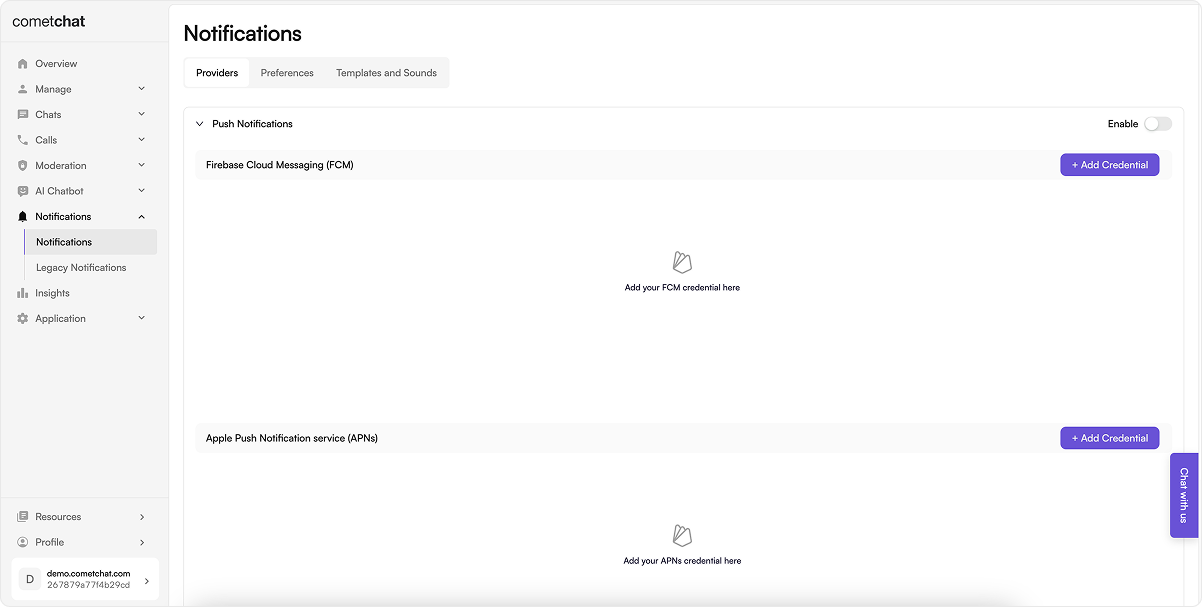
- Add an FCM provider for React Native Android; upload the Firebase service account JSON and copy the Provider ID.

2. Prepare platform credentials
2.1 Firebase Console
- Register your Android package name (same as
applicationIdinandroid/app/build.gradle) and downloadgoogle-services.jsonintoandroid/app. - Enable Cloud Messaging.

3. Local configuration
- Update
src/utils/AppConstants.tsxwithappId,authKey,region, andfcmProviderId. - Keep
app.jsonname consistent with your bundle ID / applicationId.
3.1 Dependencies snapshot (from Sample App)
Install these dependencies in your React Native app:4. Android App Setup
4.1 Configure Firebase with Android credentials
To allow Firebase on Android to use the credentials, thegoogle-services plugin must be enabled on the project. This requires modification to two files in the Android directory.
First, add the google-services plugin as a dependency inside of your /android/build.gradle file:
/android/app/build.gradle file:
4.2 Configure required permissions in AndroidManifest.xml as shown.
POST_NOTIFICATIONS on Android 13+).
4.3 Register FCM token with CometChat
Inside your main app file where you initialize CometChat, add the below code snippet after the user has logged in successfully. Initilize and register the FCM token for Android as shown:4.4 Unregister FCM token on logout
Typically, push token unregistration should occur prior to user logout, using theCometChat.logout() method.
For token unregistration, use the CometChatNotifications.unregisterPushToken() method provided by the SDKs.
5. VoIP call notifications
These steps are Android-only—copy/paste and fill your IDs.5.1 Add CallKeep services to android/app/src/main/AndroidManifest.xml
Inside the <application> tag add:
5.2 Background handler for call pushes (index.js)
Data-only FCM calls show the native dialer even when the app is killed.
5.3 Drop in VoipNotificationHandler.ts
Handles CallKeep setup, shows the incoming call UI, accepts/rejects via CometChat, and defers acceptance if login/navigation isn’t ready.
5.4 Add PendingCallManager.ts
Stores an answered call during cold-start so you can accept it once login/navigation is ready.
5.5 Wire App.tsx to init VoIP + consume pending accepts
Add this after CometChat init/login:
5.6 Call push payload (FCM data)
Send a data-only FCM message like:5.7 Local notification helper (LocalNotificationHandler.ts)
Ensure@notifee/react-nativeis installed (listed in Dependencies above). Add this helper next to yourindex.jsto show local alerts for non-call pushes:
- For a proper notification icon, create a dedicated
ic_notification.xml(vector) or PNG inandroid/app/src/main/res/drawable/; Android expects a white glyph with transparency for best results.
6. Handling notification taps and navigation
To handle notification taps and navigate to the appropriate chat screen, you need to set up handlers for both foreground and background notifications.7. Testing checklist
- Android: install on device, grant POST_NOTIFICATIONS; log in and verify FCM token registration success.
- Send a message from another user:
- Foreground: Notifee banner shows unless that chat is open.
- Background/terminated: tap opens the correct conversation; Notifee background handler runs.
- VoIP call: send
callAction=initiatedpush; expect native dialer to show. Answer and verify the call connects; sendcallAction=endedto clear it. - Rotate tokens (reinstall or revoke) and confirm
onTokenRefreshre-registers.